Drain Cleaning Los Angeles is a preventative service that removes build-up from within drain and sewer pipes before serious clogs form. Unlike chemical cleaners, which can damage pipes, a professional hydro-jetter cleans pipes thoroughly and leaves them in better shape than before.
Regular drain cleaning prevents the accumulation of soap scum, hair, paper products and other organic materials that bind together to create clogs. Clogged drains cause unpleasant odors, backups and can lead to extensive plumbing damage.
Chemical drain cleaners are pure or mixed products that can be used to unclog bathtub, sink, or garbage disposal drains that are blocked by hair, grease, food, or other organic materials. They typically work through a chemical reaction that generates heat to melt or break down the blockage. They come in solid, gel, and liquid form and can be found at most hardware stores. When used as directed, these cleaners can be safe for most pipes but should never be poured down toilets or storm drains as they can cause environmental harm.
The main concern with using chemical drain cleaners is that they often emit dangerous fumes that can irritate the skin, eyes, and inner lining of the respiratory tract. If not properly ventilated, these fumes can also aggravate existing respiratory conditions. Contact with the chemicals themselves can also cause chemical burns. Additionally, they may corrode or dissolve certain types of pipes.
Most chemical drain cleaners use acids or caustics to create their reactions. Acidic drain cleaners, for example, usually contain sulfuric acid at a high concentration. This can eat through metals like copper and iron, as well as some plastics. Caustic cleaners, on the other hand, are made of lye or potassium hydroxide and generate heat to melt or break down organic material. These cleaners are more effective against grease clogs than acidic cleaners but can still be harmful to pipes.
Even when used as directed, chemical drain cleaners are not always effective. For instance, if the clog is caused by an extreme buildup of materials or a foreign object, most cleaners will have little to no effect and can actually make the situation worse.
Before purchasing and using any chemical drain cleaner, it is essential to read the Material Safety Data Sheets (MSDS) carefully. This can help identify potential hazards, safety precautions, and proper handling and disposal guidelines. Individuals should also research different brands and products to understand their track record regarding safety. Customer reviews and feedback can also provide valuable insights into the reliability of these cleaners. Following these guidelines will minimize the risk of accidents and injuries related to the use of chemical drain cleaners.
Bio-Active Enzymatic Foam Clener
Unlike caustic chemical cleaners that use dangerous hydrochloric acid to melt away organic debris, bio-enzymatic drain cleaners use natural living organisms to break down organic waste. These enzymes and bacteria digest the clog-causing materials, fixing the problem without exposing workers to harmful fumes or damaging pipes. Bio-enzymatic cleaners are also safer for the environment than chemical drain cleaning products, which can harm the environment and human skin.
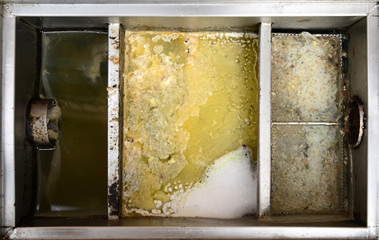
A commercial facility’s drain system is prone to clogs from hair, food particles, soap scum, and other materials that build up inside of the pipes. While it is normal for drain clogs to happen, the more frequently you clean your drain lines and the less organic material you have in the drains, the less likely you are to experience them. A bio-enzymatic drain cleaner can be used for routine maintenance in a commercial space, helping keep organic waste from building up in the pipes and causing odors or blockages.
The best bio-enzymatic drain cleaners are designed to be safe for use in a variety of environments. They will contain a mix of non-pathogenic, “good” bacteria and organic molecules that help digest the wastes, soils, stains, and malodors. This helps to prevent the clogging, staining, and malodors from returning as quickly as possible.
Before using a bio-enzymatic drain cleaner, it is recommended that you treat the drain with baking soda first. This will soften any hardened material and make it easier for the enzymes and bacteria to work their magic. Then, dilute the bio-enzymatic cleaner in about 200ml (approximately 1 small cup) of barely lukewarm water and pour it down the drain. It is important not to use hot water, as this will kill the microbes. Repeat at 1-week intervals to maintain free flowing drains.
Some of the newer bio-enzymatic pre soak spray foams are formulated to eliminate, prevent, and guard against the build-up of scum, mould & decaying organic matter that cause drain blockages, odours & health risks. These enzymatic solutions can also be used as a pre-soak for laryngoscopes, endoscopes, biopsy forceps, hemostats and other surgical instruments to reduce bio-burden adhesion prior to decontamination & cleaning, reducing cleaning time & improving instrument turnaround. Before purchasing any enzymatic solution, be sure to review the IFU to ensure that it will be safe to use with your equipment and in your specific environment.
Snakes & Augers
If you’ve been hearing gurgling sounds from your sinks and toilets, it may be time to call in the experts for drain cleaning. Cheaper solutions like chemical drain cleaners can only dislodge a small portion of the clog, but can often leave behind residue or cause damage to your pipes. It’s also possible that the blockage is more serious than you might think. If you notice that your toilet is overflowing or your sinks are draining at a trickle, it’s important to turn off the water to prevent further damage and possible flooding.
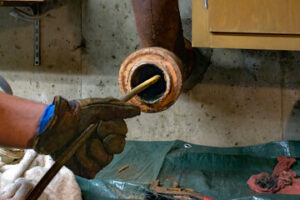
A clogged drain can be caused by many different things. Solidified cooking grease can narrow a pipe and eventually lead to a complete blockage, soap scum can build up on the inner surface of the pipe, or objects can fall down a drain and become stuck. A plumber can use a tool called a drain snake or auger to break up clogs and pull them out of the pipes. This method is much less invasive than using chemicals and can be used on any type of pipe, including sewer lines.
The most common drain snake is a long, flexible metal cable with a helix-shaped head on the end that snags and breaks up clogs in your plumbing system. These tools can be purchased at most hardware stores, but for more stubborn clogs, a power drain auger is often necessary. These motorized machines can bore through and remove even the most stubborn blockages in your drain pipes and sewer lines.
Before you start snaking your drain, make sure to put on gloves and safety goggles to avoid any potential injuries. It’s also a good idea to place a bucket or towel beneath the drain to catch any debris that might fall down during the process. Lastly, don’t forget to wash off your drain snake after use! Bacteria-laden hair and debris can build up on the springs and along the cable, and if left wet, the wire could rust.
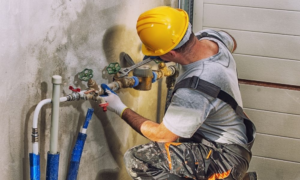
If you are unsure of your ability to safely operate a drain auger, it’s always best to call in the professionals. These powerful machines can cause a lot of damage to your pipes if they are not properly used, and it’s easy to get the wrong tool for the job. A professional plumber will know which tools to use, how to install them properly, and can help you prevent future clogs by inspecting your entire plumbing system.
Other Tools
Having the right tools for drain cleaning can save you time and money, so it is important to know what your options are. There are several tools a professional plumber uses to address stubborn blockages, including augers and power snakes. There are also commercial chemical cleaners for more serious issues. For simple clogs, there are plungers and homemade home remedies like boiling water and baking soda.
An auger is a long, flexible cable with a corkscrew on the end that you feed into the drain opening. Unlike the hand-held drain snake you might pick up at the hardware store, motorized augers are powered by electricity and reach much farther into pipes. These are the professionals’ choice when it comes to clearing extensively blocked pipes because they can physically break up or dislodge a clog without damaging the pipe walls.
These machines are expensive, so you should use them sparingly. They can damage your pipes and other plumbing if you use them wrong. If you do have to use them, follow the manufacturer’s directions carefully to avoid causing damage.
Another tool that professional plumbers have is a hydro-jet drain cleaner. This is an extremely powerful machine that emits a stream of high-pressure, hot water that cleans and breaks up the clog while simultaneously scouring the inside of the pipe. This is a great preventive maintenance tool to use regularly, especially if your plumbing system frequently encounters grease and other contaminants that can cause clogs.
Having the right tools for drain cleaning can make your job easier and help you keep your home or business plumbing functioning properly. However, it is important to know that not all clogs are the same. For example, a single strand of hair may not be much of an issue but multiple strands can become knotted together and prevent waste flow. It is important to know what type of clog you are dealing with so that you can select the best drain cleaning tool for the job. Once you have the right tool, your clogged drain should clear in no time.